
Supercharge Your Email Strategy: Automate Emails, Spark Conversations, and Boost Engagement with our Powerful Email Automation Tools

Within one to two quarters your business growth will be seen when using our services. Everthing from scratch we can help you with this! Our mission is to help small and medium enterprises to become big companies.
Add a tracking code to the links within your email campaigns and get a complete view of the performance of each campaign's.
To view, analyze, and optimize open, click, and reply rates, and effectively track the true performance of a message all the way to a desired goal.

Target the right people dynamically using stored behavioral and customer data, even as things rapidly change and evolve.
Export comprehensive message performance data within a specified time period to a CSV file and seamlessly through our API integration.
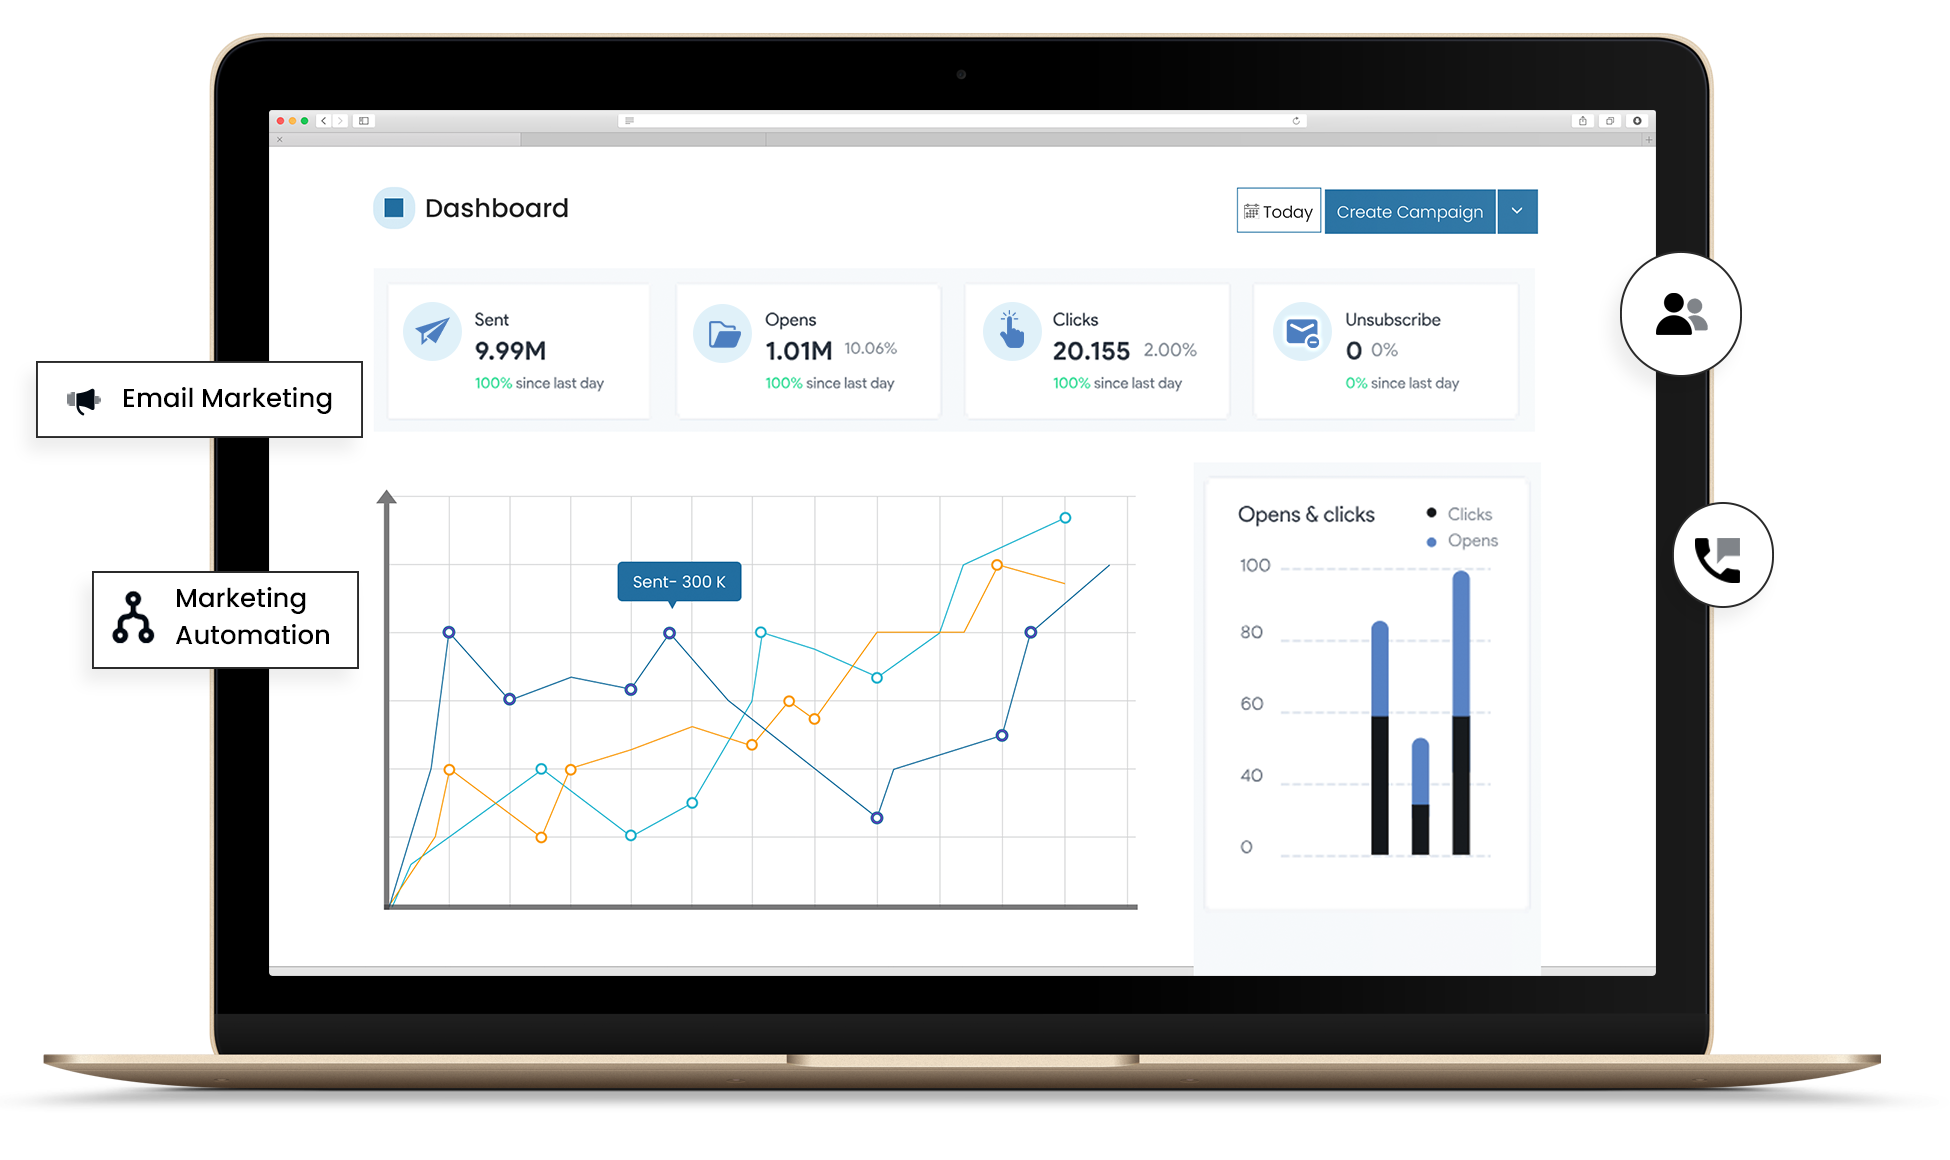
Experience seamless email campaign management with our user-friendly platform. Effortlessly create, send, and track engaging email campaigns, ensuring reliable delivery to recipients' inboxes. Gain valuable insights through real-time analytics, enabling you to optimize engagement and achieve marketing success with ease.
It's super easy to send an email campaign with the Primailer dashboard.


You can import contacts to Primailer from CSV files, APIs,
and CRMs like Hubspot and Salesforce.


Create visually stunning email designs without tech or
design dependencies.
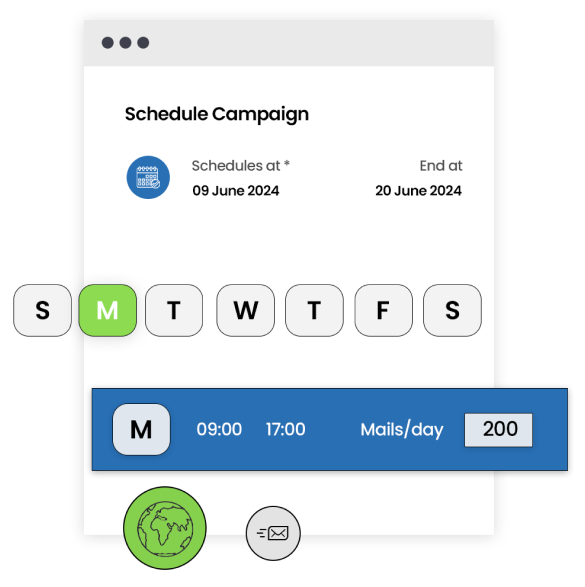

Create and send automated bulk email marketing
campaigns in
just a few minutes.
Choose a reliable SMTP service with secure
connections,
robust infrastructure, and detailed analytics for maximum email deliverability and
scalability.

.png)
Track open and click rates to evaluate email
campaign
success. Gain insights for optimizing content, subject lines, and call-to-action
buttons, driving higher engagement and conversion rates.


Primailer is more than just a bulk email-sending platform.

Create and send dynamic AMP emails for higher engagement and conversions with Primailer.
Send dynamic emails like live stock market feed inside an email that gets updated in real-time for higher engagement.
Create and send bulk transactional emails based on the events triggered by user behavior.

Conduct online surveys within emails to collect valuable information from your participants using our survey creation tool.

Measure your mass email campaign performance and optimize it for better ROI with email analytics.

Send personalized mass email campaigns with automated workflows and visual journey editor.
Bulk email software is used to deliver mass marketing email campaigns to a large number of recipients at once without any hassle. You can use the bulk email service provider to upload and manage your contact list, segment the list, and send bulk email campaigns.
Primailer is one of the best bulk email service providers with better email infrastructure and support. Also, with Primailer, you can create emails with a import contacts, segment the list, add interactive widgets like forms to email, measure campaign performance with analytics, get expert consultation, and more...

Expand your business reach and grow your customer base through effective email marketing strategies and campaigns.

.png)

Copyright 2024 Primailer | Made with ❤ in India